The cheapest cameras worth running
“Budget” doesn’t have to mean “disappointing.” The cameras here clear the bar that matters: they trigger on deer, they hold up outdoors, and they deliver images clear enough to read antlers, direction of travel and time of day. Below that bar are ultra-cheap cameras that miss deer, eat batteries and die in a month — false economy. The goal isn’t the lowest price; it’s the lowest price that still earns its spot on the tree. Each of these does.
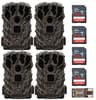
Match the camera to the job. The Moultrie Edge 3 is the pick if you want cellular on a budget— images to your phone, and built-in memory so there is no card to buy. The Browning Strike Force Pro X is the one to reach for when image qualitymatters most and you’re happy to pull the card. The Stealth Cam Browtine is the grab-and-hangchoice that’s ready to run out of the package, and the Wildgame Encounter is priced to buy in multiples so you can blanket a property.
Cellular vs SD on a budget
The single biggest cost decision at the budget end isn’t which camera — it’s cellular versus SD, because they cost money in completely different ways.
What a cellular camera really costs
A cellular camera sends photos to your phone over a data plan, which means you pay by the plan, not just the box. A cheap cellular camera can still add up once you’re paying every month, and running several multiplies that. The upside is enormous for hunting the deer without spooking them: you get intel without ever walking in. The Moultrie Edge 3 keeps this affordable — a low entry price and plans with no contract — but you should still budget the plan as part of the true cost. Our subscription cost guide lays out the math.
What an SD camera really costs
An SD-card camera costs nothing monthly— you pay once and you’re done. The catch is that you have to physically visit each camera to pull the card, and every visit leaves scent and disturbance in the exact place you’re trying to hunt. On a budget that’s often the right trade, especially on ground you don’t hunt hard or can check on the way to a stand, but it’s a real cost paid in intrusion rather than dollars. The Browning, Stealth Cam and Wildgame picks are all SD cameras for exactly this reason. If avoiding fees is the priority, start with our no-subscription cameras guide.
Several cheap cameras vs one great one
Here’s the case for going wide instead of deep. A single premium camera watches one spot beautifully; the deer are using ten. Patterning a buck is about reading movement and timing across the property— where he travels, which direction, at what hour, in what conditions — and you can’t triangulate that from one location no matter how sharp the images are. Three or four budget cameras on different pinch points, trails and food sources will teach you more about a deer than one flagship on a single tree.
That’s why we include a pick chosen specifically for buying in multiples. Coverage beats resolution when the goal is a pattern: more cameras mean more data points, faster confirmation of a travel route, and a real read on when a buck is moving in daylight. If you can afford one great camera or three good ones, three good ones usually win for patterning. Then use those photos well — our guide on reading trail camera photos turns the images into a plan.
What you give up at budget prices
Being honest about the trade-offs is the whole point of a budget roundup. You are giving up a couple of real things, and it’s worth knowing where.
- Night image quality.This is the biggest compromise. Budget cameras use simpler infrared arrays and smaller sensors, so nighttime photos are grainier and can wash out or blur a moving deer — and deer move a lot at night. You’ll usually still identify the animal and read direction, but fine detail suffers after dark. If night clarity is your top priority, that’s where spending more actually shows up.
- Trigger speed and detection.Cheaper cameras can be a touch slower to wake and fire, and their detection zones can be narrower, so a deer moving fast across the frame occasionally ends up as a nose or a tail. Aim the camera along a trail rather than across it, and set it where deer slow down — a scrape, a food source, a pinch point — to get the most out of a modest trigger.
- Battery life and build. Budget housings and electronics can be less weatherproof and harder on batteries over a long season. Good lithium batteries and a little care with placement go a long way toward closing that gap.
None of these are dealbreakers for patterning deer — they’re the reason these cameras are affordable. Know the compromise, place the camera to work around it, and a budget setup will absolutely get the job done. For placement and setup, see how to set up a trail camera.
How to build a budget camera setup
Put it together in the order that gives you the most information for the least money. Start with two or three inexpensive SD cameras on your best-known trails and food sources to confirm what’s using the property and when. Add one affordable cellular camera on the spot you least want to disturb — a bedding-area edge or a stand approach — so you get intel there without walking in and leaving scent. As you learn the movement, move cameras to tighten the pattern rather than buying more. That mix — several cheap SD cameras plus one budget cellular where it counts — gives you property-wide coverage and clean intel on the sensitive spots, all without a flagship price tag.